
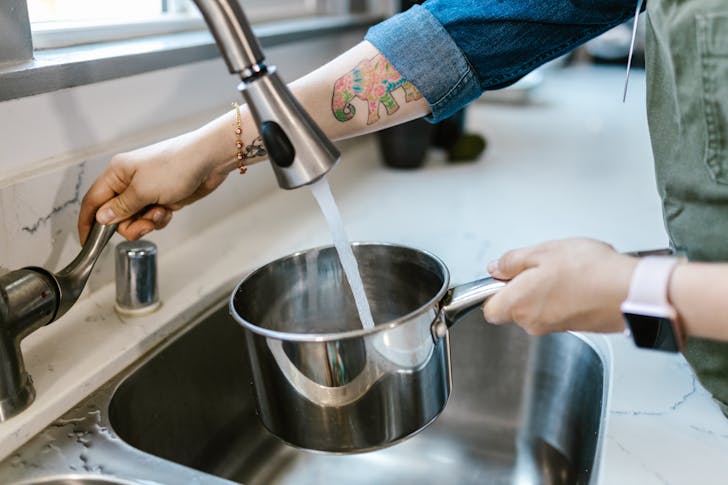
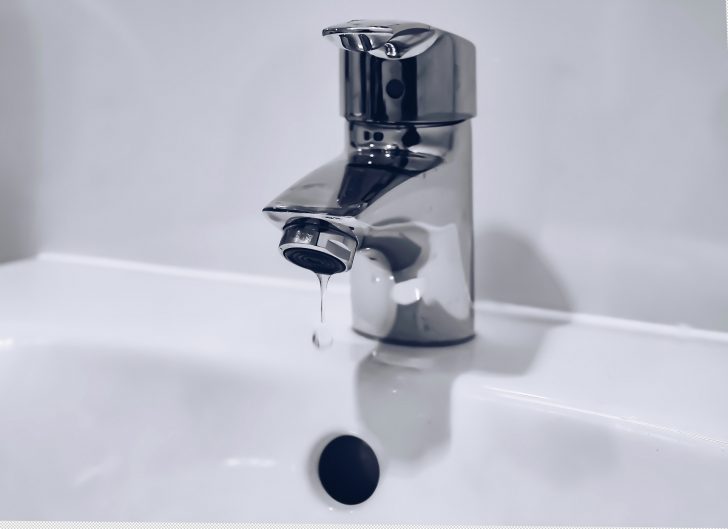
A tap that doesn’t completely shut off can seem like a minor annoyance. The steady drip is easy to tune out, especially when you have bigger things to think about. It feels harmless — just a little sound in the background.
But that quiet drip is doing more damage than you think.
Every single drop is treated water going straight down the drain. You’ve already paid for it. And if it’s hot water, you’ve also paid to heat it. Over weeks and months, that small, constant leak can quietly inflate your utility bills, wear out plumbing components, and even cause hidden damage under your sink.
The good news? Fixing a dripping tap is usually simple. You don’t need advanced DIY skills or expensive equipment. With a bit of time and the correct replacement part, you can stop the leak — and stop the waste.
How a Tiny Leak Turns Into a Real Expense
A tap that drips every few seconds may not seem serious, but that’s water flowing 24 hours a day for no reason.
If the leak comes from a hot water tap, the cost increases even more. Your boiler or water heater has to keep reheating water that’s being wasted. Over the course of a year, that extra energy consumption can noticeably increase your utility bills without you realizing why.
Beyond the financial cost, there’s physical damage to consider:
- Constant moisture speeds up corrosion.
- Mineral buildup stains sinks and fixtures.
- Cabinets under the sink can swell or rot.
- Metal fittings weaken over time.
What could have been a quick, inexpensive repair can become a much bigger plumbing issue if ignored for too long.
Why Taps Start Dripping in the First Place
Most leaks happen because one small component has worn out.
1. Worn Washers (Common in Older Taps)
Traditional compression taps rely on a rubber washer to block the flow of water. Each time you turn the handle, the washer presses against the valve seat. After years of friction and pressure, it eventually flattens, cracks, or hardens — and stops sealing properly.
2. Faulty Ceramic Cartridges (Modern Mixer Taps)
Many modern taps use ceramic cartridges instead of rubber washers. These cartridges control water flow with precision, but they can crack or become clogged with mineral deposits. When that happens, water slips through even when the tap is turned off.
3. Damaged O-Rings
O-rings seal the area around the tap spindle. When they wear out, you might notice water leaking from around the handle or pooling at the base of the tap.
4. High Water Pressure
Sometimes the issue isn’t a worn part at all. Excessively high water pressure can push water past seals that are still in decent condition.
5. Corrosion or Loose Internal Parts
Over time, internal components can corrode or shift slightly, preventing the tap from shutting off tightly.
How to Identify the Problem Before Taking It Apart
Before grabbing your tools, take a few minutes to observe the leak carefully.
- Drip from the spout? Likely a washer or cartridge issue.
- Water around the base? Probably an O-ring problem.
- Stiff or grinding handle? Internal wear or mineral buildup.
Turn the tap on and off slowly. Pay attention to how it feels. Any resistance, uneven movement, or unusual sounds can point you toward the faulty part.
Understanding the source first saves time and ensures you buy the correct replacement.
How to Fix a Dripping Tap Step by Step
Repairing a tap is usually straightforward if you stay organized.
Step 1: Turn Off the Water Supply
Shut off the isolation valve under the sink if available. If not, turn off the main water supply. Then open the tap to drain any remaining water.
Step 2: Remove the Handle
Pop off the decorative cap on the handle to reveal the screw underneath. Unscrew it and lift the handle away carefully.
Step 3: Access the Valve or Cartridge
Use a spanner to loosen the valve assembly or cartridge housing. Work slowly and keep all parts in order as you remove them.
Step 4: Inspect the Components
Examine the washer, cartridge, and O-rings. If they look cracked, flattened, brittle, or damaged in any way, they need replacing.
Tip: Take the old part with you to the hardware store to ensure you get an exact match.
Step 5: Reassemble Carefully
Install the new part and reassemble everything snugly. Avoid overtightening — forcing components can cause more damage.
Step 6: Turn the Water Back On and Test
Restore the water supply and test the tap. If the drip has stopped, you’ve successfully fixed it.
If You Can’t Fix It Immediately
If you don’t have the replacement part yet, gently tightening the tap can sometimes slow the leak temporarily — especially if something has loosened over time.
Be cautious, though. Overtightening can wear out parts faster or crack components, making the repair more complicated later.
A Small Fix That Saves Money
A dripping tap might seem insignificant, but over time it wastes water, increases energy use, and damages plumbing. Fixing it early protects your home and keeps unnecessary expenses from building up.
Sometimes the smartest financial decision isn’t a big investment — it’s taking care of the small problems before they grow.